


There is nothing better than walking out your door and being able to harvest dinner just steps from your kitchen. We don’t all have the time or dedication to tend an annual vegetable garden, but perennial vegetables are great additions that come with the convenience of only having to plant once!
Perennial vegetables return year after year, and in temperate climates will die back over the winter and miraculously re-sprout each spring. They require very little labour and input once they are established, and are often ready for picking before you even get your annual veggies in the ground!
The following are a few easy-to-grow perennial vegetables that you can add to your garden this spring, or may already have in your yard and didn’t know you could harvest!
Asparagus (Asparagus officinalis)
Asparagus is a delicious seasonal delicacy that can be eaten raw, steamed, or grilled. Their ferny, feathery foliage is quite attractive in the garden later in the season, too, and the females will develop a pretty red berry. Modern hybrids are all males however, which produce better, live longer, and don’t start seedlings in your neighbour’s yard (they’re very polite!). Like sweet corn, asparagus is best eaten as fresh as possible so growing your own may lead to a whole new taste experience for you if you’ve only ever had it from the grocery store.
Requirements: Sandy soil amended with compost and a sunny location.
Zone: Zone 3 to subtropical climates, as long as there is a dormant period induced either by cold or drought.
When to harvest: The stalks are generally productive from May to June and are then left to rest for the remainder of the growing season. To develop a healthy productive patch, do not harvest the first year. In the second year, one spear may be harvested from each plant, and by year three you should be okay to harvest every few days for a couple of months.
Note: Asparagus is sensitive to weeds and vulnerable to pest and disease problems so look for resistant hybrids that are less susceptible.
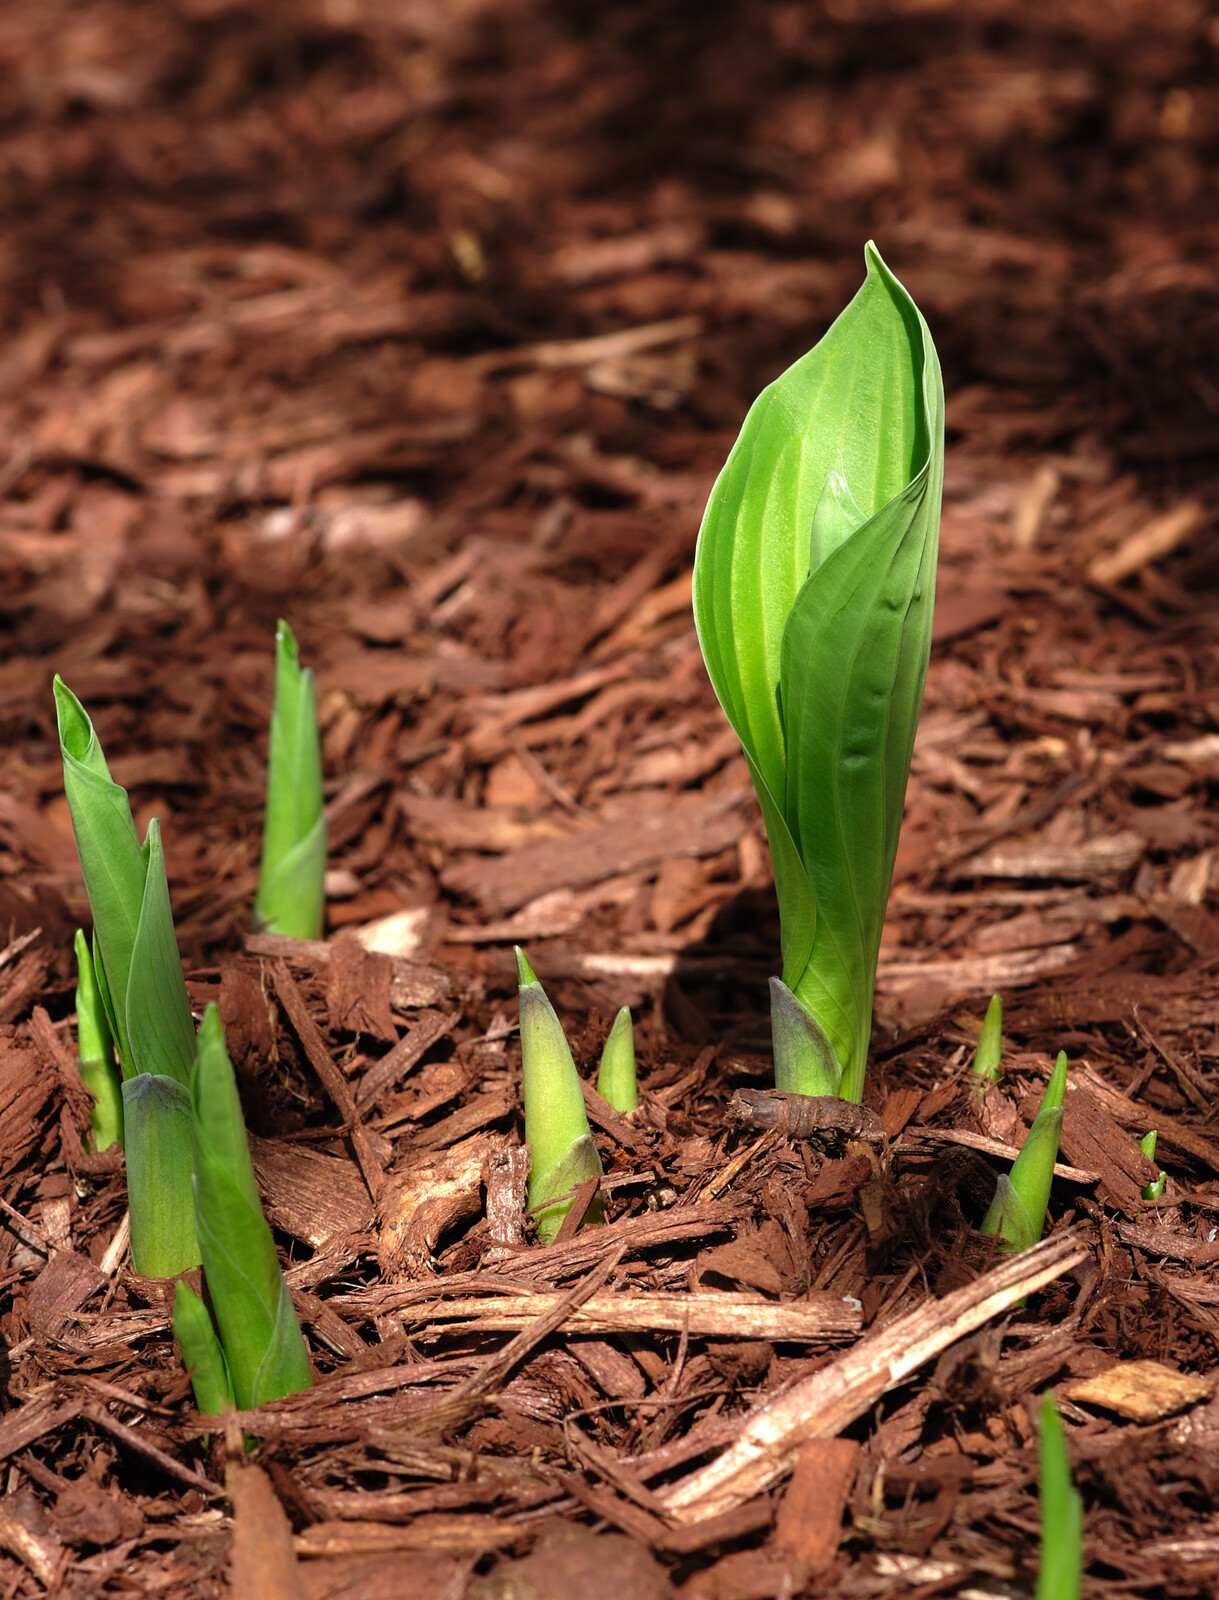
Hostas (Hosta spp.)
Who doesn’t have at least one hosta in their yard? With over 6000 named cultivars it’s no wonder! While there are many avid collectors, most people aren’t aware that these common garden plants are cultivated commercially in Asia and sold in grocery stores! After a delicious hosta dinner last spring, my 6-year-old wanted to go out and harvest more every night. Big ones, little ones, shiny, thick-leaved ones, and variegated pale ones, they all tasted good! Hosta montana and Hosta sieboldii are the most popular for eating, but all hostas are edible, so get out a sharp blade and add some hosta shoots to your plate!
Pan-fry, add to a salad, steam, blanch, or enjoy dipped in tempura and flash-fried! Hosta leaves are still edible once they open but are a little tougher and require longer cooking times than the hostons. Hosta buds and flowers make great salad toppers too!
Requirements: Easygoing about site conditions and will grow from full shade to sun.
Zone: Zones 3 to 9.
When to harvest: Hosta shoots, or hostons, are harvested in spring as they pop out of the ground and before they unfurl their generous leaves. The hoston looks a bit like asparagus spears and can be used similarly! You can harvest the entire first flush of leaves from an established plant and it will produce a second set but I prefer to spread out my cuttings by taking a third or less of individual hostons from each plant so that it will still look nice and full when the leaves emerge.
Note: They are quite loved by slugs and deer so if you have a problem with either of those you may have to fend off the competition to get a taste!
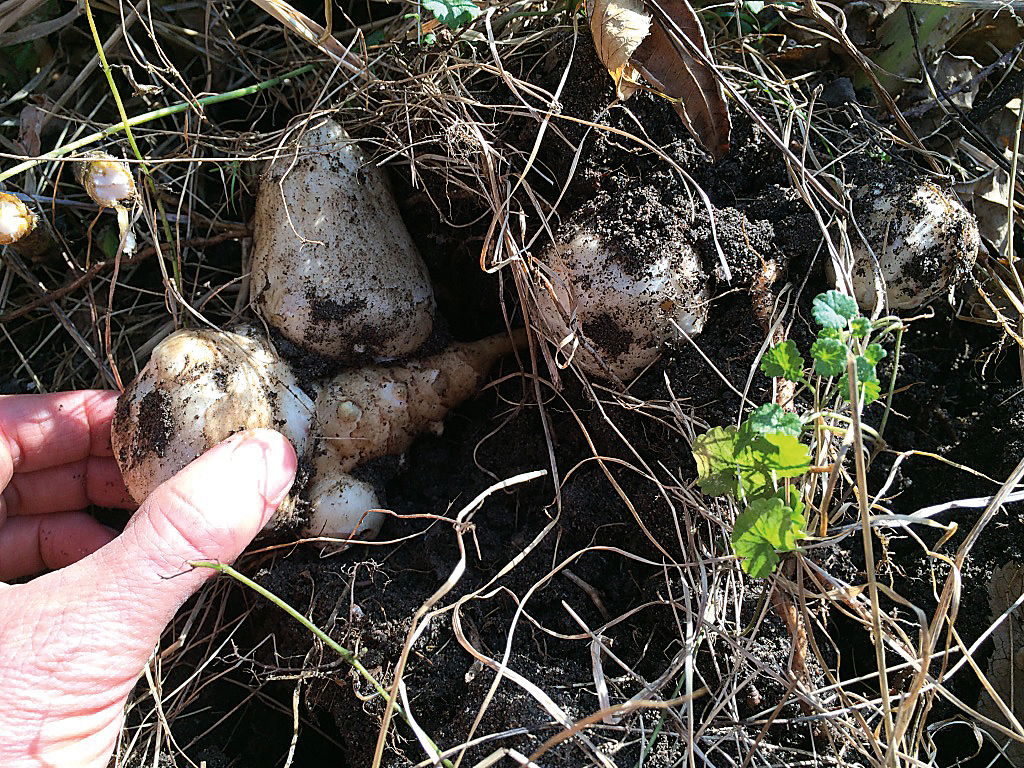
Jerusalem Artichoke (Helianthus tuberosus)
Jerusalem artichokes, also called sunchokes, were cultivated by First Nations people in eastern North America well before Europeans arrived. Newcomers to this land are only starting to discover the pleasures of this nutritious perennial vegetable! Related to sunflowers, they produce a very tall (six to twelve feet!) stalk with a small yellow sunflower that opens in the fall.
The sweetness of these tubers comes from inulin, which has no impact on blood sugar levels, can significantly increase our ability to absorb calcium, and can increase the volume of beneficial microbes in our digestive tracts. However, our inability to fully digest inulin means it can cause gas, so slow-roasting sunchokes is the best way to reduce the gaseous effects. (Eating sunchokes raw is not advised before an important meeting or a first date!)
Requirements: They can grow in full sun or light shade, prefer a good garden soil, and will spread out if given the chance! Sunchokes can form quite large colonies and any piece of tuber left in the ground will grow into a new plant the following year, so plant them somewhere they can be contained (they will push up pavement!).
Zone: Cold tolerant as far north as zone 2! They can also be grown as annuals where there is no frost, however the tubers will not be as sweet.
When to harvest: Cut back tops after frost and turn over the area as you would when digging potatoes. Sift through the soil with your hands and pull out any tubers larger than half an inch. Smaller ones get thrown back in to yield next year’s harvest.
Note: Leave some in the ground to dig up in spring, for an even sweeter harvest. Keep in mind, if you don’t harvest for a few years, yields will go down.
Sea Kale (Crambe maritima)
Wild-harvested for thousands of years on Europe’s coasts, sea kale’s beautiful, crinkled, dark green foliage was so popular that it was eventually domesticated in the 1700s. A clump of sea kale will grow to around three feet tall and wide, and can either be eaten like collard greens after flowering in the late fall, or as asparagus-like spring shoots, which are the most sought after. The small flower buds are also edible.
Requirements: Rich, fertile soil and full sun. Can tolerate salty environs.
Zone: Zones 4 to 8. Mulching over winter in colder areas is recommended.
When to harvest: Like asparagus, sea kale should be left to fill in for two years before harvesting in the third year. To grow and harvest spears, tape up drainage holes of a large plastic flowerpot, turn it upside down over the kale roots in early spring, and weigh down with a rock. Within a few weeks, tender, whitish-purple shoots can be harvested. Prepare the shoots any way you would serve asparagus.
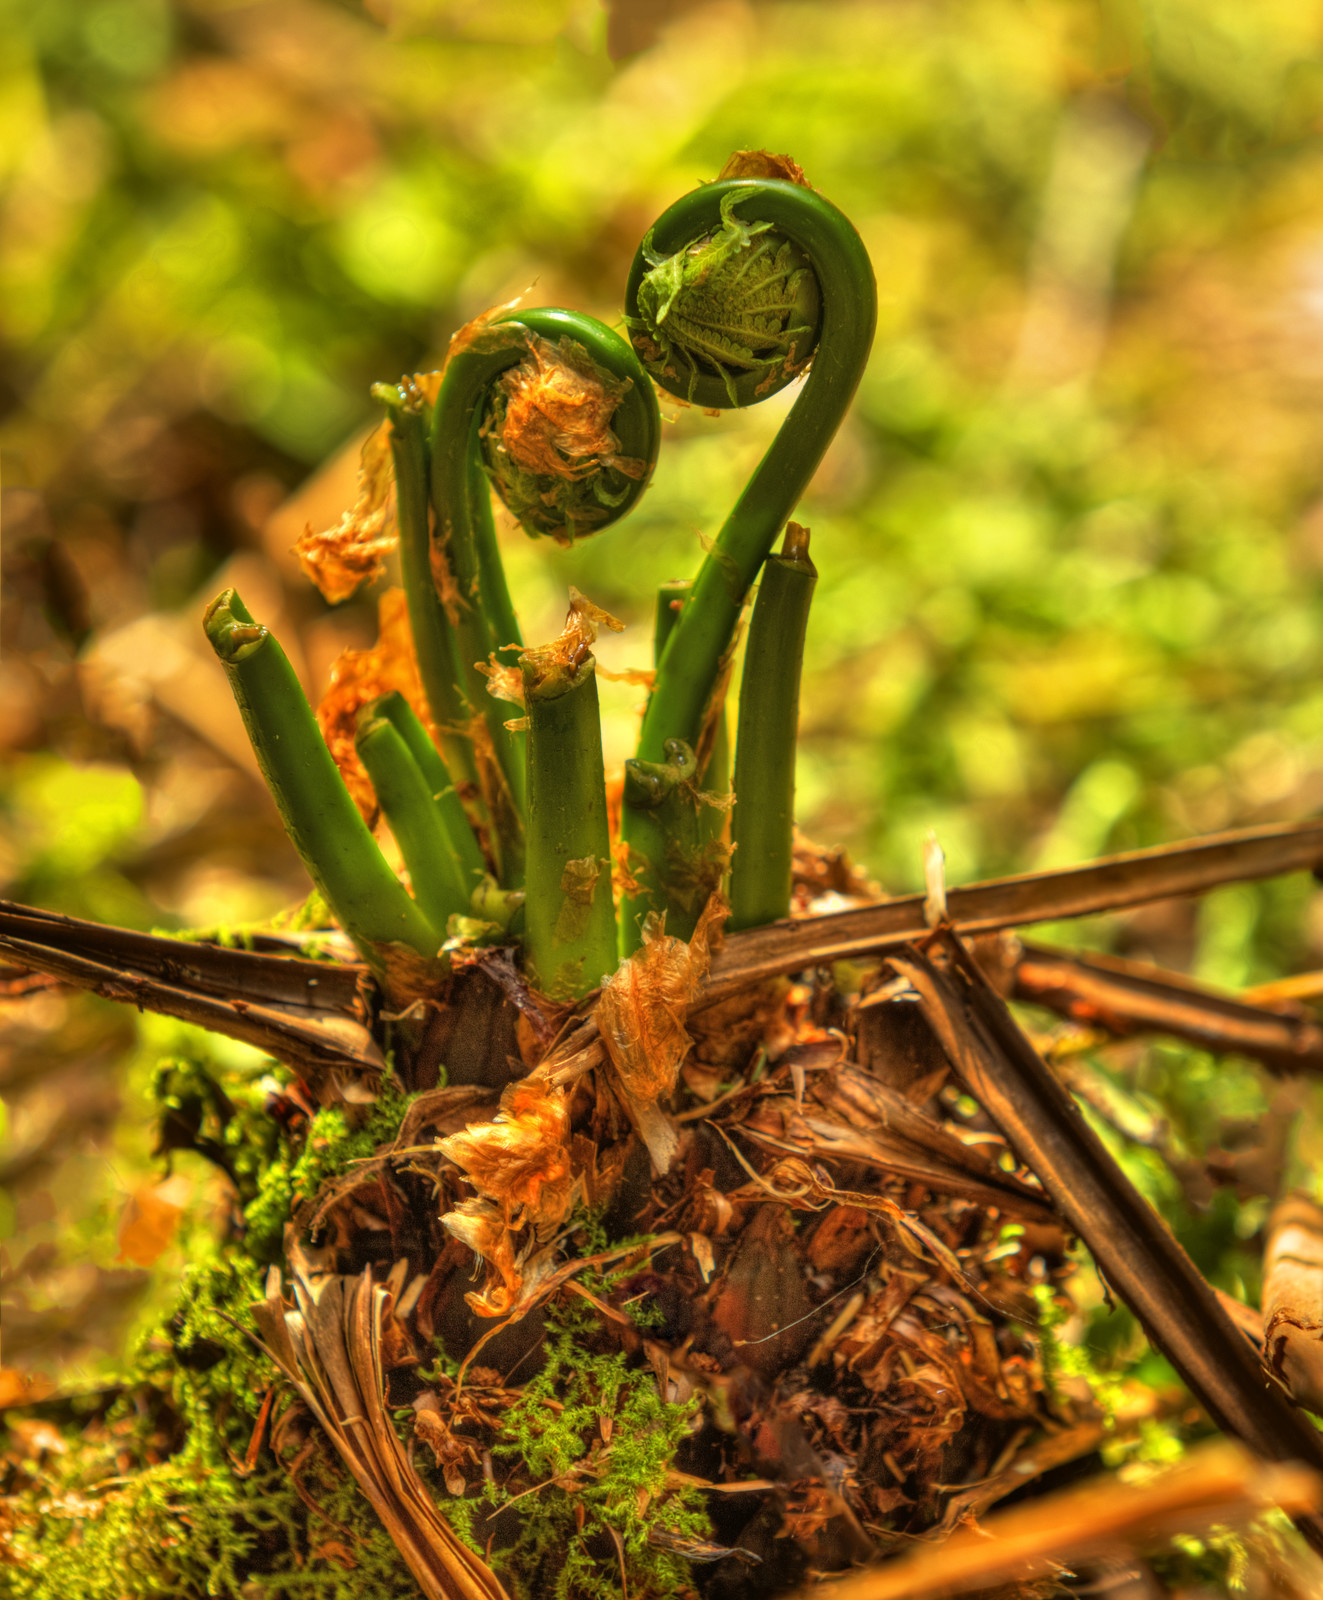
Ostrich Fern (Matteuccia struthiopteris)
Ostrich ferns, native to the east coast of North America, produce delectable fiddleheads that are only available for a short time in the spring. The fronds can reach up to six feet tall and form a tropical-like ground cover as the colony slowly spreads, making them a popular garden addition. But many people don’t realize that ostrich fern fiddleheads can also be harvested! Blanched, steamed, or fried with garlic and butter (see below for important notes on proper preparation), fiddleheads are a deliciously simple side dish full of vitamins A and C, and antioxidants.
Requirements: In the wild, ostrich ferns are generally found in floodplains and near waterways, however they will adapt to a range of garden soils, as long as it is kept moist and they are in full or partial shade.
Zone: Zones 2 to 8.
When to harvest: Harvest the fiddleheads when they are still tightly curled and emerging from the crown (a couple of inches of stem is okay), making sure to only take about a third of the shoots from each cluster so your ferns will still look lovely once they grow out. Once the fern unfurls, they become unpalatable.
Note: There is some concern about improperly prepared fiddleheads potentially causing symptoms similar to a foodborne illness. The exact cause is unknown, but is generally believed to be due to an unidentified naturally occurring toxin in the fiddleheads. To prevent exposure, make sure to wash and rinse fiddleheads well before consuming, removing as much of the brown husk as possible. Cook for 15 minutes in boiling water, or steam for 10-12 minutes, until tender (also should be done before sautéeing, frying or adding to other cooking). Discard water afterward. Never eat raw fiddleheads.
Get started by adding one (or more!) perennial veggie to your garden this season, but make sure to save a little room for future additions: there are so many perennials that deserve a chance to wow you! So plant once, watch it grow, and pick forever!
You may also enjoy: Gardening for Absolute Beginners, Planning the Garden with Kids, and Getting Kids Into Gardening.


