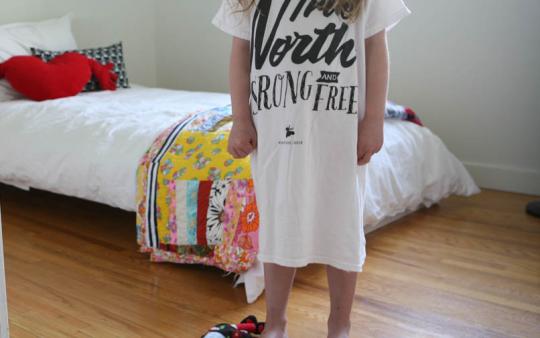
I have this vivid childhood memory of sitting on my front porch, on a warm summer evening, watching the sun set over the houses across the street. I was fresh from the bath, my hair washed, brushed, and hanging damply down my back, and I was wearing one of my dad’s old t-shirts as a nightshirt. The shirt was so long that it brushed my ankles and the armholes so big that I could probably fit my head through them. And it was the greatest, most comforting, warm, summery feeling in the world.
Finding comfortable and cool summer PJs for kids is easier said than done. I am continually encountering pyjamas that feel weird, are made of questionable materials, and although they’re cute to look at, would no doubt lead to sweaty sleeps and pinchy waistbands. Now, there are lovely organic jammies out there that are soft, and cool, and airy, and well, you get the picture. But, they can also be a bit costly, and since I am always after the best bang for my hard-earned buck, I typically shy away from pricy PJs. Anyway, after one especially fruitless PJ shopping session, I decided to say heck to the whole PJ market and make my own! I know, I know, I hate sewing. It’s true. But sometimes sewing is necessary, especially if your little one is adorable and perfect and has lovely skin that doesn't need weird fabrics irritating it.
This is a great, quick, and pretty easy upcycle project. The nightshirts are comfy, cool, and best of all, not full of those weirdo flame retardants. Plus, there is nothing cuter than little legs popping out of giant t-shirts. There just isn't.
A DIY Nightshirt that you can do while watching TV (AKA the 30 minute miracle!)
This pattern is completely customizable. You can make it as small or as billowy as you like. In the example I've included here, I used a men's large t-shirt that I procured from a case of beer. Hello, free!! I wanted it to be a bit roomy for my daughter, so I chose a t-shirt she wears that's a size or two too big. I have made nightshirts for her that are smaller, as in abover her knees, with little cap sleeves, and they're adorable. But right now she's into dresses and shirts long enough to pull over her knees when she's chillin' on the couch, so I went a bit bigger. If you'd prefer a shorter/smaller result, use a woman's small or medium t-shirt. Remember, you aren't going to be touching the length, as the hem of the t-shirt will become the hem of the nightshirt, so keep that in mind when selecting a shirt. Also, there is no fiddling with the neck hole, so a wide neck adult T might not work awesomely. Just stick with a regular crew neck t-shirt.
Here's what you need:
- An adult t-shirt, preferably cotton or other natural, breathable material.
- A t-shirt that fits your child well. Feel free to go up a size or two for a roomier nightshirt
- Sewing machine
- Coordinating thread
- A piece of chalk or pencil
Here's what you do:
Lay out the adult t-shirt and place the child’s t-shirt over top, lining up the neck and shoulders as best you can. Fold the sleeves of the child's shirt in at the seam, so there is a straight line from the child's t-shirt shoulder and bottom hem. This will become your pattern.

Once you have lined up the t-shirts, trace your pattern on the adult t-shirt with chalk etending the chalk line from the base of the child's t-shirt hem to the base of the adult t-shirt's hem, leaving ½ inch seam allowance. Cut the adult t-shirt along the chalk lines. Set aside.

You are now left with fabric remnants and extra sleeves. Don't toss them out!! Instead, save those sleeves, because they'll become cute new sleeves! Cut the sleeves from the extra fabric at the seam line. Now, there's no exact pattern for this, you just want them to fit your child. My best advice is to roughly follow the sleeve size from your child's shirt you used as the pattern. Leave a ½ inch seam allowance. Cut the seam the runs under the arm, then stich along the bottom of the sleeve, like this:

Turn the body of the cut t-shirt inside out, line up, and pin your fabric together along the new seam line and sew both sides up to the armpit, leaving the arm hole open.

Turn the sleeves so they are right side out and line them up to your t-shirt body (which should still be inside out) like this:

This is probably the hardest step. Pay attention to the diagram here, or else you'll end up sewing and resewing the sleeve multiple times. Which I did as I was making this nightshirt. A nightshirt I have made many, many times. And still mess up. Every. Single. Time. Mostly because I am bad at math, which I feel extends to every aspect of my life and is something that I can blame on random mistakes. Okay, so the sleeve is right side out, and the body is inside out. Remember this. Live this. Write it on your hand. Invent song-like chants. Slide the sleeve into the arm hole, and line up the raw edges of the sleeve and armhole.
Once the raw sleeve edge and arm hole edge are lined up, pin around arm holes, and stitch sleeves into place.

Cut thread tails, turn right side in and, voilà, comfy summer jammies!


